Groups
With GitLab Groups, you can:
- Assemble related projects together.
- Grant members access to several projects at once.
For a video introduction to GitLab Groups, see GitLab University: Repositories, Projects and Groups.
Groups can also be nested in subgroups.
Find your groups by clicking Groups > Your Groups in the top navigation.

The Groups dropdown in the top navigation was introduced in GitLab 11.1.
The Groups page displays:
- All groups you are a member of, when Your groups is selected.
- A list of public groups, when Explore public groups is selected.
Each group on the Groups page is listed with:
- How many subgroups it has.
- How many projects it contains.
- How many members the group has, not including members inherited from parent group(s).
- The group's visibility.
- A link to the group's settings, if you have sufficient permissions.
- A link to leave the group, if you are a member.
Use cases
You can create groups for numerous reasons. To name a couple:
- Grant access to multiple projects and multiple team members in fewer steps by organizing related projects under the same namespace and adding members to the top-level group.
- Make it easier to
@mentionall of your team at once in issues and merge requests by creating a group and including the appropriate members.
For example, you could create a group for your company members, and create a subgroup for each individual team. Let's say you create a group called company-team, and you create subgroups in this group for the individual teams backend-team, frontend-team, and production-team.
- When you start a new implementation from an issue, you add a comment:
"
@company-team, let's do it!@company-team/backend-teamyou're good to go!" - When your backend team needs help from frontend, they add a comment:
"
@company-team/frontend-teamcould you help us here please?" - When the frontend team completes their implementation, they comment:
"
@company-team/backend-team, it's done! Let's ship it@company-team/production-team!"
Namespaces
In GitLab, a namespace is a unique name to be used as a user name, a group name, or a subgroup name.
http://gitlab.example.com/usernamehttp://gitlab.example.com/groupnamehttp://gitlab.example.com/groupname/subgroup_name
For example, consider a user named Alex:
- Alex creates an account on GitLab.com with the username
alex; their profile will be accessed underhttps://gitlab.example.com/alex - Alex creates a group for their team with the group name
alex-team; the group and its projects will be accessed underhttps://gitlab.example.com/alex-team - Alex creates a subgroup of
alex-teamwith the subgroup namemarketing; this subgroup and its projects will be accessed underhttps://gitlab.example.com/alex-team/marketing
By doing so:
- Any team member mentions Alex with
@alex - Alex mentions everyone from their team with
@alex-team - Alex mentions only the marketing team with
@alex-team/marketing
Issues and merge requests within a group
Issues and merge requests are part of projects. For a given group, you can view all of the issues and merge requests across all projects in that group, together in a single list view.
Bulk editing issues and merge requests
For details, see bulk editing issues and merge requests.
Create a new group
For a list of words that are not allowed to be used as group names see the reserved names.
To create a new Group, either:
-
In the top menu, click Groups and then Your Groups, and click the green button New group.

-
Or, in the top menu, expand the
plussign and choose New group.


Add the following information:

- The Group name will automatically populate the URL. Optionally, you can change it.
This is the name that displays in group views.
The name can contain only:
- Alphanumeric characters
- Underscores
- Dashes and dots
- Spaces
- The Group URL is the namespace under which your projects will be hosted.
The URL can contain only:
- Alphanumeric characters
- Underscores
- Dashes and dots (it cannot start with dashes or end in a dot)
- Optionally, you can add a brief description to tell others what this group is about.
- Optionally, choose an avatar for your group.
- Choose the visibility level.
For more details on creating groups, watch the video GitLab Namespaces (users, groups and subgroups).
Add users to a group
A benefit of putting multiple projects in one group is that you can give a user access to all projects in the group with one action.
Add members to a group by navigating to the group's dashboard and clicking Members.

Select the permission level, and add the new member. You can also set the expiring date for that user; this is the date on which they will no longer have access to your group.
Consider a group with two projects:
- On the Group Members page, you can now add a new user to the group.
- Now, because this user is a Developer member of the group, they automatically get Developer access to all projects within that group.
To increase the access level of an existing user for a specific project, add them again as a new member to the project with the desired permission level.
Request access to a group
As a group owner, you can enable or disable the ability for non-members to request access to your group. Go to the group settings, and click Allow users to request access.
As a user, you can request to be a member of a group, if that setting is enabled. Go to the group for which you'd like to be a member, and click the Request Access button on the right side of your screen.

Once access is requested:
- Up to ten group owners are notified of your request via email. Email is sent to the most recently active group owners.
- Any group owner can approve or decline your request on the members page.

If you change your mind before your request is approved, just click the Withdraw Access Request button.

Changing the owner of a group
Ownership of a group means at least one of its members has Owner permission. Groups must have at least one owner.
Changing the owner of a group with only one owner is possible. To change the sole owner of a group:
- As an administrator:
- Go to the group's {users} Members tab.
- Give a different member Owner permissions.
- Refresh the page. You can now remove Owner permissions from the original owner.
- As the current group's owner:
- Go to the group's {users} Members tab.
- Give a different member Owner permissions.
- Have the new owner sign in and remove Owner permissions from you.
Remove a member from the group
Only users with permissions of Owner can manage group members.
You can remove a member from the group if the given member has a direct membership in the group. If membership is inherited from a parent group, then the member can be removed only from the parent group itself.
When removing a member, you can decide whether to unassign the user from all issues and merge requests they are currently assigned or leave the assignments as they are.
- Unassigning the removed member from all issues and merge requests might be helpful when a user is leaving a private group and you wish to revoke their access to any issues and merge requests they are assigned.
- Keeping the issues and merge requests assigned might be helpful for groups that accept public contributions where a user doesn't have to be a member to be able to contribute to issues and merge requests.
To remove a member from a group:
- In a group, go to {users} Members.
- Click the Delete {remove} button next to a group member you want to remove. A Remove member modal appears.
- (Optional) Select the Also unassign this user from related issues and merge requests checkbox.
- Click Remove member.
Filter and sort members in a group
- Introduced in GitLab 12.6.
- Improved in GitLab 13.7.
- Feature flag removed in GitLab 13.8.
The following sections illustrate how you can filter and sort members in a group. To view these options, navigate to your desired group, go to Members, and include the noted search terms.
Membership filter
By default, inherited and direct members are displayed. The membership filter can be used to display only inherited or only direct members.
Only display inherited members
Include Membership = Inherited in the search text box.

Only display direct members
Include Membership = Direct in the search text box.

2FA filter
Owner permissions required.
By default, members with 2FA enabled and disabled are displayed. The 2FA filter can be used to display only members with 2FA enabled or only members with 2FA disabled.
Only display members with 2FA enabled
Include 2FA = Enabled in the search text box.

Only display members with 2FA disabled
Include 2FA = Disabled in the search text box.

Search
You can search for members by name, username, or email.

Sort
You can sort members by Account, Access granted, Max role, or Last sign-in in ascending or descending order.

Changing the default branch protection of a group
Introduced in GitLab 12.9.
By default, every group inherits the branch protection set at the global level.
To change this setting for a specific group:
- Go to the group's Settings > General page.
- Expand the Permissions, LFS, 2FA section.
- Select the desired option in the Default branch protection dropdown list.
- Click Save changes.
To change this setting globally, see Default branch protection.
NOTE: In GitLab Premium or higher, GitLab administrators can choose to disable group owners from updating the default branch protection.
Add projects to a group
There are two different ways to add a new project to a group:
-
Select a group, and then click New project. You can then continue creating your project.
-
While you are creating a project, select a group namespace you've already created from the dropdown menu.


Default project-creation level
- Introduced in GitLab Premium 10.5.
- Brought to GitLab Starter in 10.7.
- Moved to GitLab Core in 11.10.
By default, Developers and Maintainers can create projects under a group.
To change this setting for a specific group:
- Go to the group's Settings > General page.
- Expand the Permissions, LFS, 2FA section.
- Select the desired option in the Allowed to create projects dropdown list.
- Click Save changes.
To change this setting globally, see Default project creation protection.
View group details
A group's Details page includes tabs for:
- Subgroups and projects.
- Shared projects.
- Archived projects.
Group activity analytics overview
- Introduced in GitLab Starter 12.10 as a beta feature
The group details view also shows the number of the following items created in the last 90 days: (STARTER)
- Merge requests.
- Issues.
- Members.
These Group Activity Analytics can be enabled with the group_activity_analytics feature flag.

For details, see the section on how you can View group activity.
View group activity
A group's Activity page displays the most recent actions taken in a group, including:
- Push events: Recent pushes to branches.
- Merge events: Recent merges.
- Issue events: Issues opened or closed.
- Epic events: Epics opened or closed.
- Comments: Comments opened or closed.
- Team: Team members who have joined or left the group.
- Wiki: Wikis created, deleted, or updated.
The entire activity feed is also available in Atom format by clicking the RSS icon.
To view a group's Activity page:
- Go to the group's page.
- In the left navigation menu, go to Group Overview and select Activity.
Transfer projects into groups
Learn how to transfer a project into a group.
Sharing a project with a group
You can share your projects with a group and give all group members access to the project at once.
Alternatively, you can lock the sharing with group feature.
Sharing a group with another group
Introduced in GitLab 12.7.
Similarly to sharing a project with a group, you can share a group with another group to give direct group members access to the shared group. This is not valid for inherited members.
To share a given group, for example, 'Frontend' with another group, for example, 'Engineering':
- Navigate to your 'Frontend' group page and use the left navigation menu to go to your group Members.
- Select the Invite group tab.
- Add 'Engineering' with the maximum access level of your choice.
- Click Invite.
All the members of the 'Engineering' group will have been added to 'Frontend'.
Manage group memberships via LDAP (STARTER ONLY)
Group syncing allows LDAP groups to be mapped to GitLab groups. This provides more control over per-group user management. To configure group syncing edit the group_base DN ('OU=Global Groups,OU=GitLab INT,DC=GitLab,DC=org'). This OU contains all groups that will be associated with GitLab groups.
Group links can be created using either a CN or a filter. These group links are created on the Group Settings -> LDAP Synchronization page. After configuring the link, it may take over an hour for the users to sync with the GitLab group.
For more information on the administration of LDAP and group sync, refer to the main LDAP documentation.
NOTE: If an LDAP user is a group member when LDAP Synchronization is added, and they are not part of the LDAP group, they will be removed from the group.
Creating group links via CN (STARTER ONLY)
To create group links via CN:
- Select the LDAP Server for the link.
- Select
LDAP Group cnas the Sync method. - In the LDAP Group cn text input box, begin typing the CN of the group. There will be a dropdown menu with matching CNs within the configured
group_base. Select your CN from this list. - In the LDAP Access section, select the permission level for users synced in this group.
- Click the
Add Synchronizationbutton to save this group link.

Creating group links via filter (PREMIUM ONLY)
To create group links via filter:
- Select the LDAP Server for the link.
- Select
LDAP user filteras the Sync method. - Input your filter in the LDAP User filter box. Follow the documentation on user filters.
- In the LDAP Access section, select the permission level for users synced in this group.
- Click the
Add Synchronizationbutton to save this group link.

Overriding user permissions (STARTER ONLY)
In GitLab 8.15 and later, LDAP user permissions can now be manually overridden by an admin user. To override a user's permissions:
- Go to your group's Members page.
- Select the pencil icon in the row for the user you are editing.
- Select the brown
Edit permissionsbutton in the modal.

Now you will be able to edit the user's permissions from the Members page.
Epics (ULTIMATE)
Introduced in GitLab Ultimate 10.2.
Epics let you manage your portfolio of projects more efficiently and with less effort by tracking groups of issues that share a theme, across projects and milestones.
Group wikis (PREMIUM)
- Introduced in GitLab Premium 13.5.
Group wikis work the same way as project wikis, please refer to those docs for details on usage.
Group wikis can be edited by members with Developer permissions and above.
Group wikis limitations
There are a few limitations compared to project wikis:
- Git LFS is not supported.
- Group wikis are not included in global search, group exports, and Geo replication.
- Changes to group wikis don't show up in the group's activity feed.
- Group wikis can't be moved using the project repository moves API.
For updates, you can follow:
- The epic tracking feature parity with project wikis.
- The issue for adding the ability to move group wikis using the API.
Group Security Dashboard (ULTIMATE)
Get an overview of the vulnerabilities of all the projects in a group and its subgroups.
Learn more about the Group Security Dashboard.
Insights (ULTIMATE)
Introduced in GitLab Ultimate 12.0.
Configure the Insights that matter for your groups or projects, allowing users to explore data such as:
- Triage hygiene
- Issues created/closed per a given period
- Average time for merge requests to be merged
- Much more
Transferring groups
From GitLab 10.5, you can transfer groups in the following ways:
- Transfer a subgroup to a new parent group.
- Convert a top-level group into a subgroup by transferring it to the desired group.
- Convert a subgroup into a top-level group by transferring it out of its current group.
When transferring groups, note:
- Changing a group's parent can have unintended side effects. See Redirects when changing repository paths.
- You can only transfer groups to groups you manage.
- You must update your local repositories to point to the new location.
- If the immediate parent group's visibility is lower than the group's current visibility, visibility levels for subgroups and projects will change to match the new parent group's visibility.
- Only explicit group membership is transferred, not inherited membership. If the group's owners have only inherited membership, this leaves the group without an owner. In this case, the user transferring the group becomes the group's owner.
- Transfers will fail if packages exist in any of the projects within the group, or in any of its subgroups.
Group settings
After creating a group, you can manage its settings by navigating to the group's dashboard, and clicking Settings.
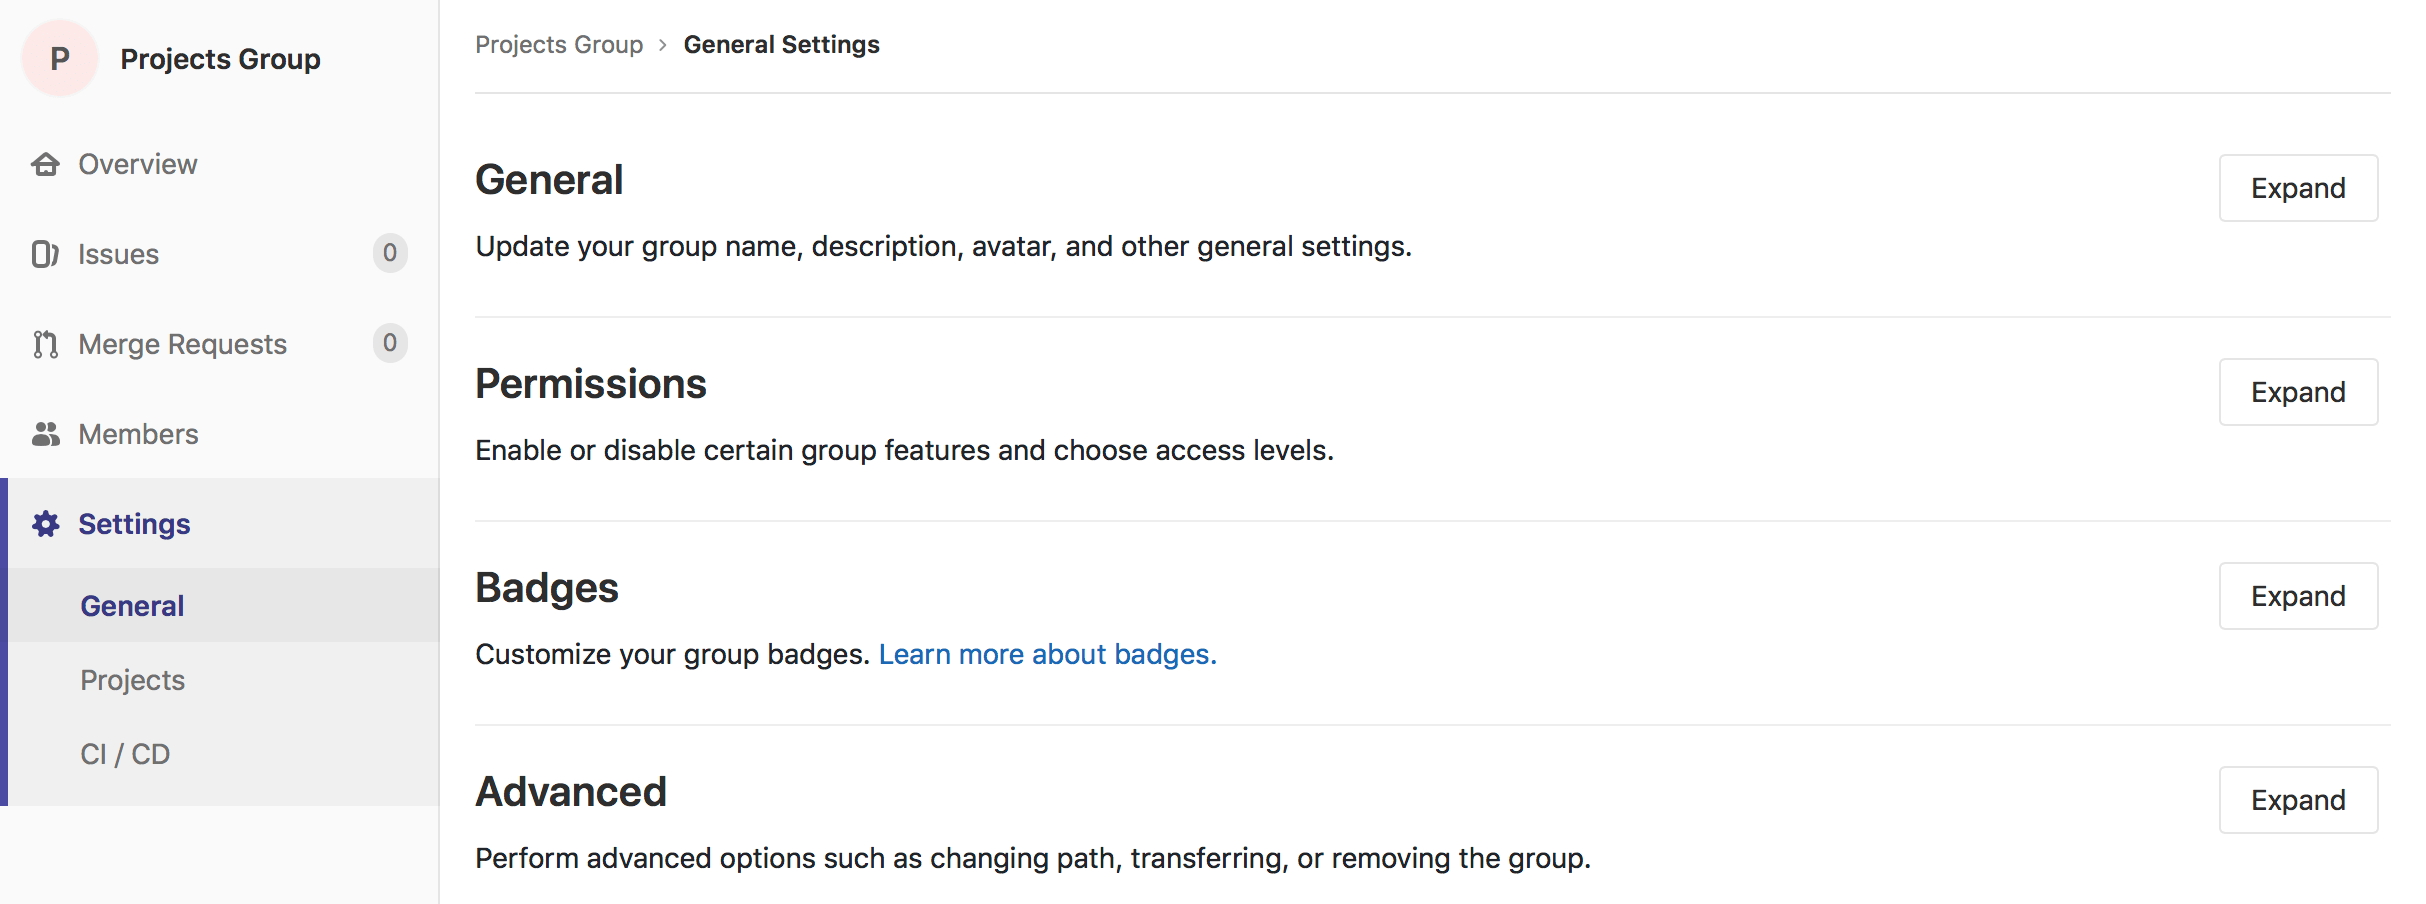
General settings
In addition to editing any settings you previously set when creating the group, you can also access further configurations for your group.
Changing a group's path
Changing a group's path (group URL) can have unintended side effects. Read how redirects will behave before proceeding.
If you are vacating the path so it can be claimed by another group or user, you may need to rename the group too, since both names and paths must be unique.
To change your group path (group URL):
- Navigate to your group's Settings > General page.
- Expand the Path, transfer, remove section.
- Enter a new name under Change group URL.
- Click Change group URL.
WARNING: It is currently not possible to rename a namespace if it contains a project with Container Registry tags, because the project cannot be moved.
NOTE: If you want to retain ownership over the original namespace and protect the URL redirects, then instead of changing a group's path or renaming a username, you can create a new group and transfer projects to it.
Group repository settings
You can change settings that are specific to repositories in your group.
Custom initial branch name (CORE ONLY)
- Introduced in GitLab 13.6.
By default, when you create a new project in GitLab, the initial branch is called master.
For groups, a group administrator can customize the initial branch name to something
else. This way, every new project created under that group from then on will start from the custom branch name rather than master. To do so:
- Go to the Group page > Settings > Repository and expand Default initial branch name.
- Change the default initial branch to a custom name of your choice.
- Save Changes.
Remove a group
To remove a group and its contents:
- Navigate to your group's Settings > General page.
- Expand the Path, transfer, remove section.
- In the Remove group section, click the Remove group button.
- Confirm the action when asked to.
This action either:
- Removes the group, and also queues a background job to delete all projects in that group.
- Since GitLab 12.8, on Premium or Silver or higher tiers, this action adds a background job to mark a group for deletion. By default, the job schedules the deletion 7 days in the future. You can modify this waiting period through the instance settings.
Since GitLab 13.6, if the user who sets up the deletion leaves or is otherwise removed from the group before the actual deletion happens, the job is cancelled, and the group is no longer scheduled for deletion.
Restore a group (PREMIUM)
Introduced in GitLab 12.8.
To restore a group that is marked for deletion:
- Navigate to your group's Settings > General page.
- Expand the Path, transfer, remove section.
- In the Restore group section, click the Restore group button.
Enforce 2FA to group members
Add a security layer to your group by enforcing two-factor authentication (2FA) for all group members.
Share with group lock
Prevent projects in a group from sharing a project with another group to enable tighter control over project access.
For example, let's say you have two distinct teams (Group A and Group B) working together in a project, and to inherit the group membership, you share the project between the two groups A and B. Share with group lock prevents any project within the group from being shared with another group, guaranteeing that only the right group members have access to those projects.
To enable this feature, navigate to the group settings page. Select Share with group lock and Save the group.

Member Lock (STARTER)
Member lock lets a group owner prevent any new project membership to all of the projects within a group, allowing tighter control over project membership.
For example, if you want to lock the group for an Audit Event, enable Member lock to guarantee that project membership cannot be modified during that audit.
To enable this feature:
- Navigate to the group's Settings > General page.
- Expand the Permissions, LFS, 2FA section, and select Member lock.
- Click Save changes.

This will disable the option for all users who previously had permissions to operate project memberships, so no new users can be added. Furthermore, any request to add a new user to a project through API will not be possible.
IP access restriction (PREMIUM)
- Introduced in GitLab Ultimate and Gold 12.0.
- Moved to GitLab Premium and Silver in 13.1.
NOTE: IP Access Restrictions are currently not functioning as expected on GitLab.com. Some users may experience blocked Git operations or have difficulties accessing projects. Please review the following bug report for more information.
To make sure only people from within your organization can access particular resources, you have the option to restrict access to groups and their underlying projects, issues, etc, by IP address. This can help ensure that particular content doesn't leave the premises, while not blocking off access to the entire instance.
Add one or more allowed IP subnets using CIDR notation to the group settings and anyone coming from a different IP address won't be able to access the restricted content.
Restriction currently applies to:
- UI.
- From GitLab 12.3, API access.
- From GitLab 12.4, Git actions via SSH.
To avoid accidental lock-out, admins and group owners are able to access the group regardless of the IP restriction.
To enable this feature:
- Navigate to the group’s Settings > General page.
- Expand the Permissions, LFS, 2FA section, and enter IP address ranges into Allow access to the following IP addresses field.
- Click Save changes.

Allowed domain restriction (PREMIUM)
- Introduced in GitLab Premium and Silver 12.2.
- Support for specifying multiple email domains introduced in GitLab 13.1
You can restrict access to groups by allowing only users with email addresses in particular domains to be added to the group.
Add email domains you want to allow and users with emails from different domains won't be allowed to be added to this group.
Some domains cannot be restricted. These are the most popular public email domains, such as:
gmail.comyahoo.comhotmail.comaol.commsn.comhotmail.co.ukhotmail.frlive.comoutlook.comicloud.com
To enable this feature:
- Navigate to the group's Settings > General page.
- Expand the Permissions, LFS, 2FA section, and enter the domain names into Restrict membership by email field.
- Click Save changes.

This will enable the domain-checking for all new users added to the group from this moment on.
Group file templates (PREMIUM)
Group file templates allow you to share a set of templates for common file types with every project in a group. It is analogous to the instance template repository feature, and the selected project should follow the same naming conventions as are documented on that page.
You can only choose projects in the group as the template source. This includes projects shared with the group, but it excludes projects in subgroups or parent groups of the group being configured.
You can configure this feature for both subgroups and immediate parent groups. A project in a subgroup will have access to the templates for that subgroup, as well as any immediate parent groups.
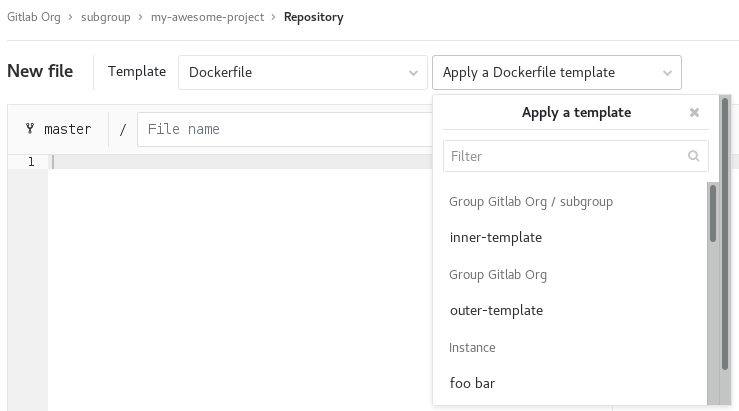
To enable this feature, navigate to the group settings page, expand the Templates section, choose a project to act as the template repository, and Save group.

Group-level project templates (PREMIUM)
Define project templates at a group level by setting a group as the template source. Learn more about group-level project templates.
Disabling email notifications
Introduced in GitLab 12.2.
You can disable all email notifications related to the group, which includes its subgroups and projects.
To enable this feature:
- Navigate to the group's Settings > General page.
- Expand the Permissions, LFS, 2FA section, and select Disable email notifications.
- Click Save changes.
Disabling group mentions
Introduced in GitLab 12.6.
You can prevent users from being added to a conversation and getting notified when anyone mentions a group in which those users are members.
Groups with disabled mentions are visualized accordingly in the autocompletion dropdown.
This is particularly helpful for groups with a large number of users.
To enable this feature:
- Navigate to the group's Settings > General page.
- Expand the Permissions, LFS, 2FA section, and select Disable group mentions.
- Click Save changes.
Enabling delayed Project removal (PREMIUM)
Introduced in GitLab 13.2.
By default, projects within a group are deleted immediately. Optionally, on Premium or Silver or higher tiers, you can configure the projects within a group to be deleted after a delayed interval.
During this interval period, the projects will be in a read-only state and can be restored, if required. The interval period defaults to 7 days, and can be modified by an admin in the instance settings.
To enable delayed deletion of projects:
- Navigate to the group's Settings > General page.
- Expand the Permissions, LFS, 2FA section, and check Enable delayed project removal.
- Click Save changes.
NOTE: The group setting for delayed deletion is not inherited by sub-groups and has to be individually defined for each group.
Prevent project forking outside group (PREMIUM)
Introduced in GitLab 13.3.
By default, projects within a group can be forked. Optionally, on Premium or Silver or higher tiers, you can prevent the projects within a group from being forked outside of the current top-level group.
Previously this setting was available only for groups enforcing group managed account. This setting will be
removed from SAML setting page and migrated to group setting, but in the interim period of changes both of those settings will be taken into consideration, if even one is set to true then it will be assumed group does not allow forking projects outside.
To enable prevent project forking:
- Navigate to the top-level group's Settings > General page.
- Expand the Permissions, LFS, 2FA section, and check Prevent project forking outside current group.
- Click Save changes.
Advanced settings
- Projects: View all projects within that group, add members to each project, access each project's settings, and remove any project, all from the same screen.
- Webhooks: Configure webhooks for your group.
- Kubernetes cluster integration: Connect your GitLab group with Kubernetes clusters.
- Audit Events: View Audit Events for the group. (STARTER ONLY)
- Pipelines quota: Keep track of the pipeline quota for the group.
- Integrations: Configure integrations for your group.
Group push rules (STARTER)
- Introduced in GitLab Starter 12.8.
- Feature flag removed in GitLab 13.4.
Group push rules allow group maintainers to set push rules for newly created projects within the specific group.
To configure push rules for a group, navigate to {push-rules} on the group's sidebar.
When set, new subgroups have push rules set for them based on either:
- The closest parent group with push rules defined.
- Push rules set at the instance level, if no parent groups have push rules defined.
Maximum artifacts size (CORE ONLY)
For information about setting a maximum artifact size for a group, see Maximum artifacts size.
User contribution analysis (STARTER)
With GitLab Contribution Analytics, you have an overview of the contributions (pushes, merge requests, and issues) performed by your group members.
Issue analytics (PREMIUM)
With GitLab Issue Analytics, you can see a bar chart of the number of issues created each month in your groups.
Repositories analytics (PREMIUM)
- Introduced in GitLab 13.6.
- Feature flag removed in GitLab 13.7.
With GitLab Repositories Analytics, you can download a CSV of the latest coverage data for all the projects in your group.
Check code coverage for all projects
Introduced in GitLab Premium 13.7.
See the overall activity of all projects with code coverage with GitLab Repositories Analytics.
It displays the current code coverage data available for your projects:

Dependency Proxy
Use GitLab as a dependency proxy for upstream Docker images.