GitLab Web Editor
Sometimes it's easier to make quick changes directly from the GitLab interface than to clone the project and use the Git command-line tool. In this feature highlight, we look at how you can create a new file, directory, branch, or tag from the file browser. All of these actions are available from a single dropdown menu.
Create a file
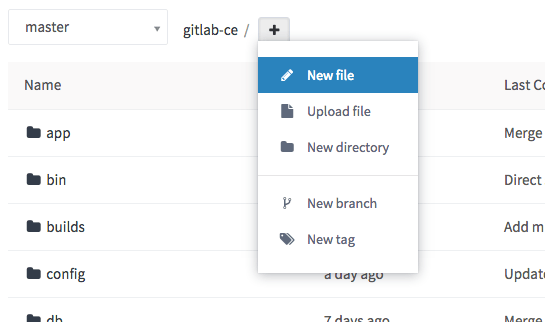
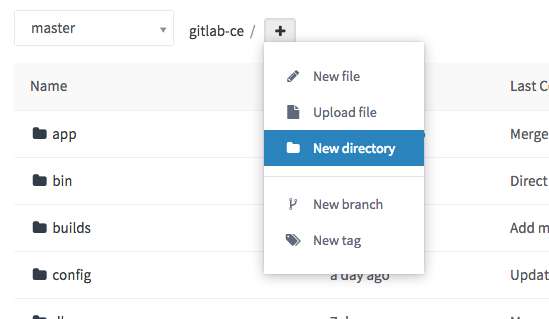
From a project's files page, click the '+' button to the right of the branch selector.
Choose New file from the dropdown.
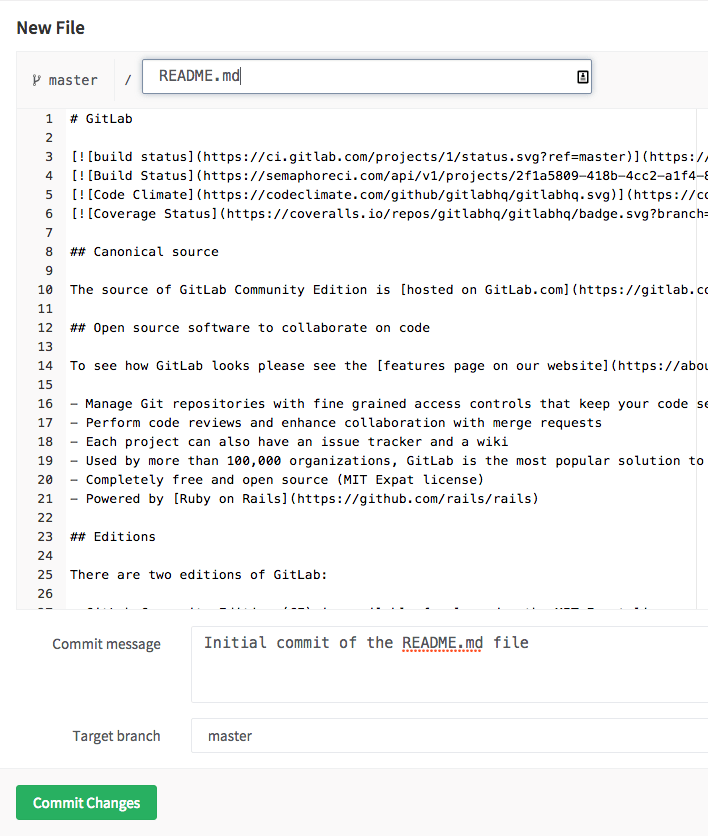
Enter a filename in the Filename box. Then, add file content in the editor area. Add a descriptive commit message and choose a branch. The branch field will default to the branch you were viewing in the file browser. If you enter a new branch name, a checkbox will appear, allowing you to start a new merge request after you commit the changes.
When you are satisfied with your new file, click Commit Changes at the bottom.
Shortcuts
You can use handy shortcuts when editing a file through the Web Editor, which are the same as the Web IDE's. For details, see the documentation for Command Palette.
Template dropdowns
When starting a new project, there are some common files that the new project might need too. Therefore a message will be displayed by GitLab to make this easy for you.
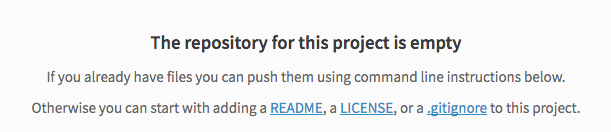
When clicking on either LICENSE or .gitignore and so on, a dropdown will be displayed
to provide you with a template that might be suitable for your project.
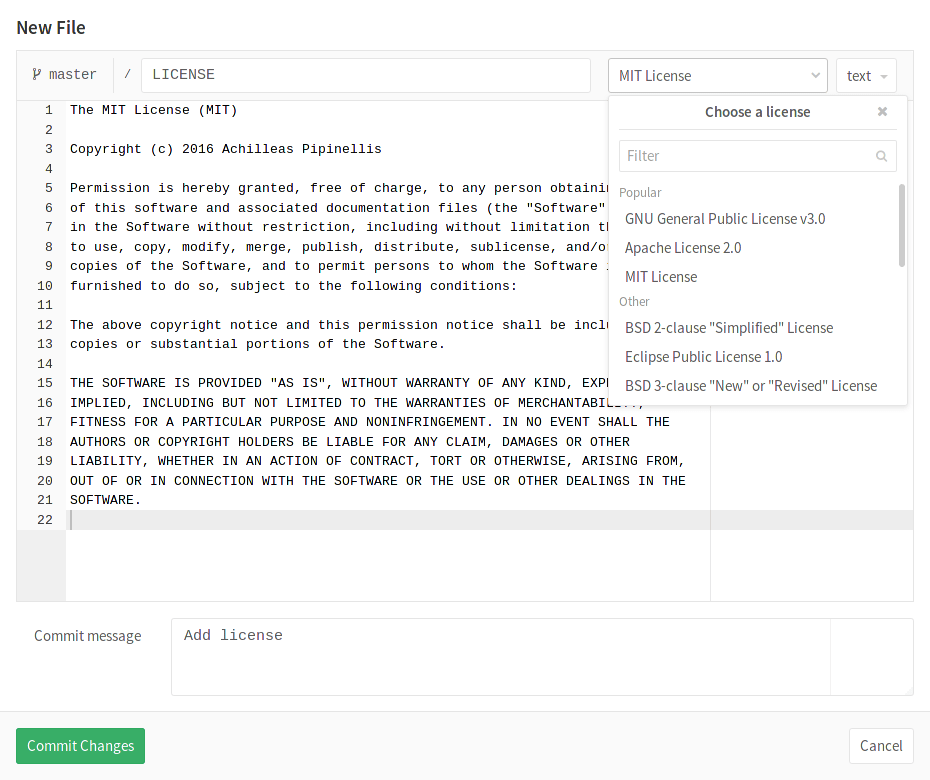
The license, changelog, contribution guide, or .gitlab-ci.yml file could also
be added through a button on the project page. In the example below, the license
has already been created, which creates a link to the license itself.

NOTE: The Set up CI/CD button will not appear on an empty repository. You have to at least add a file in order for the button to show up.
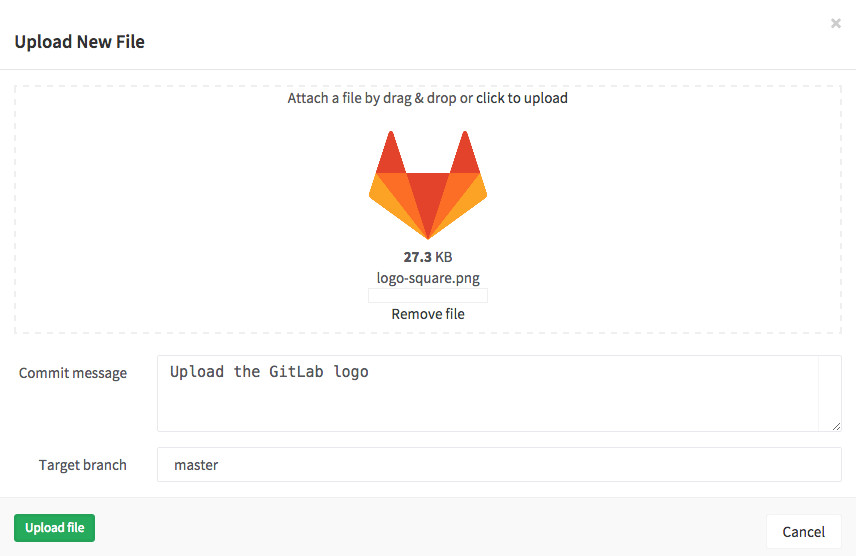
Upload a file
The ability to create a file is great when the content is text. However, this doesn't work well for binary data such as images, PDFs, or other file types. In this case, you need to upload a file.
From a project's files page, click the '+' button to the right of the branch selector. Choose Upload file from the dropdown.

Once the upload dialog pops up, there are two ways to upload your file. Either drag and drop a file on the popup or use the click to upload link. A file preview will appear once you have selected a file to upload.
Enter a commit message, choose a branch, and click Upload file when you are ready.
Create a directory
To keep files in the repository organized it is often helpful to create a new directory.
From a project's files page, click the plus button (+) to the right of the branch selector.
Choose New directory from the dropdown.
In the new directory dialog, enter a directory name, a commit message, and choose the target branch. Click Create directory to finish.

Create a new branch
There are multiple ways to create a branch from the GitLab web interface.
Create a new branch from an issue
Introduced in GitLab 8.6.
If your development workflow dictates to have an issue for every merge request, you can quickly create a branch directly from the issue to speed the process up. The new branch, and later its merge request, will be marked as related to this issue. Once merged, the MR will automatically close the issue. You can see a Create merge request dropdown below the issue description.
NOTE: You won't see the Create merge request button if there is already a branch with the same name or a referenced merge request or your project has an active fork relationship. If you would like to make this button appear, a possible workaround is to remove your project's fork relationship. Once removed, the fork relationship cannot be restored. This project will no longer be able to receive or send merge requests to the source project or other forks.

This dropdown contains the options Create merge request and branch and Create branch.
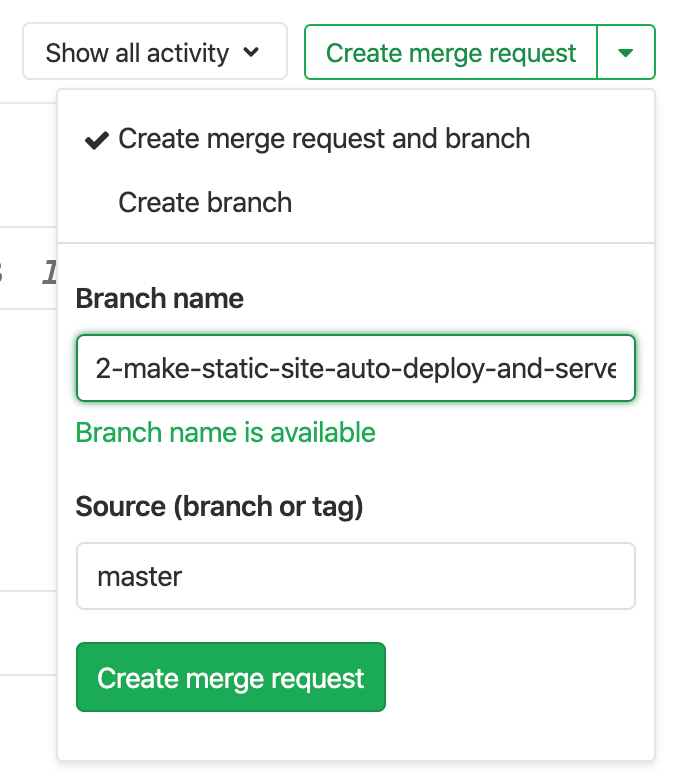
Once you choose one of these options, a new branch or branch and merge request
will be created based on the default
branch of your project (by default, master). The branch name will be based on
the title of the issue, and as a prefix, it will have its internal ID. Thus, the example
screenshot above will create a branch named
2-make-static-site-auto-deploy-and-serve.
When you click the Create branch button in an empty
repository project, GitLab automatically creates a master branch, commits
a blank README.md file to it, and creates and redirects you to a new branch
based on the issue title.
If your project is already configured with a deployment service,
such as Kubernetes, GitLab takes one step further and prompts you to set up
auto deploy
by helping you create a .gitlab-ci.yml file.
After the branch is created, you can edit files in the repository to fix
the issue. When a merge request is created based on the newly created branch,
the description field will automatically display the issue closing pattern
Closes #ID, where ID the ID of the issue. This will close the issue once the
merge request is merged.
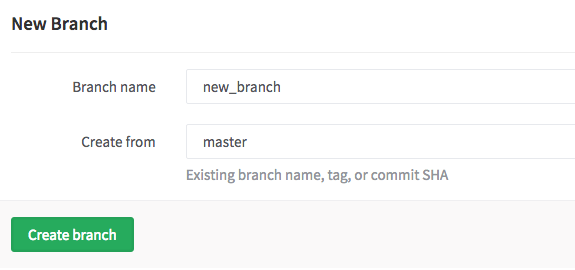
Create a new branch from a project's dashboard
If you want to make changes to several files before creating a new merge request, you can create a new branch upfront. From a project's files page, choose New branch from the dropdown.

Enter a new Branch name. Optionally, change the Create from field to choose which branch, tag, or commit SHA this new branch will originate from. This field will autocomplete if you start typing an existing branch or tag. Click Create branch and you will be returned to the file browser on this new branch.
You can now make changes to any files, as needed. When you're ready to merge the changes back to master, you can use the widget at the top of the screen. This widget only appears for a period of time after you create the branch or modify files.

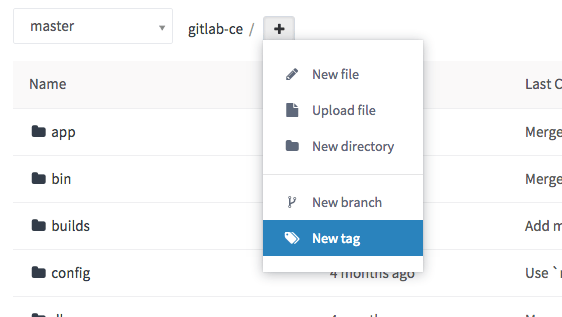
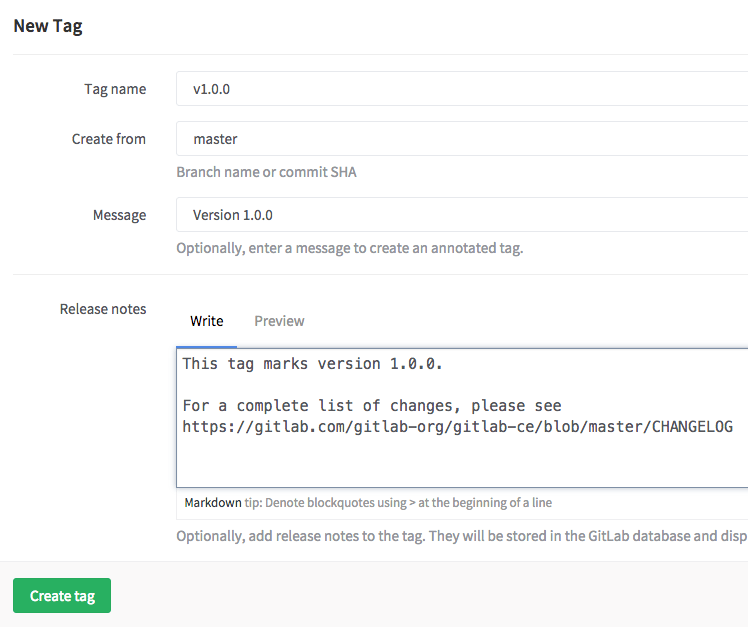
Create a new tag
Tags are useful for marking major milestones such as production releases, release candidates, and more. You can create a tag from a branch or a commit SHA. From a project's files page, choose New tag from the dropdown.
Give the tag a name such as v1.0.0. Choose the branch or SHA from which you
would like to create this new tag. You can optionally add a message and
release notes. The release notes section supports Markdown format and you can
also upload an attachment. Click Create tag, and you will be taken to the tag
list page.
Tips
When creating or uploading a new file or creating a new directory, you can
trigger a new merge request rather than committing directly to master. Enter
a new branch name in the Target branch field. You will notice a checkbox
appear that is labeled Start a new merge request with these changes. After
you commit the changes you will be taken to a new merge request form.

If you'd prefer not to use your primary email address for commits created through the web editor, you can choose to use another of your linked email addresses from the User Settings > Edit Profile page.