Wiki (CORE)
A separate system for documentation called Wiki, is built right into each GitLab project. It is enabled by default on all new projects and you can find it under Wiki in your project.
Wikis are very convenient if you don't want to keep your documentation in your repository, but you do want to keep it in the same project where your code resides.
You can create Wiki pages in the web interface or locally using Git since every Wiki is a separate Git repository.
Introduced in GitLab Premium 13.5, group wikis became available. Their usage is similar to project wikis, with a few limitations.
First time creating the Home page
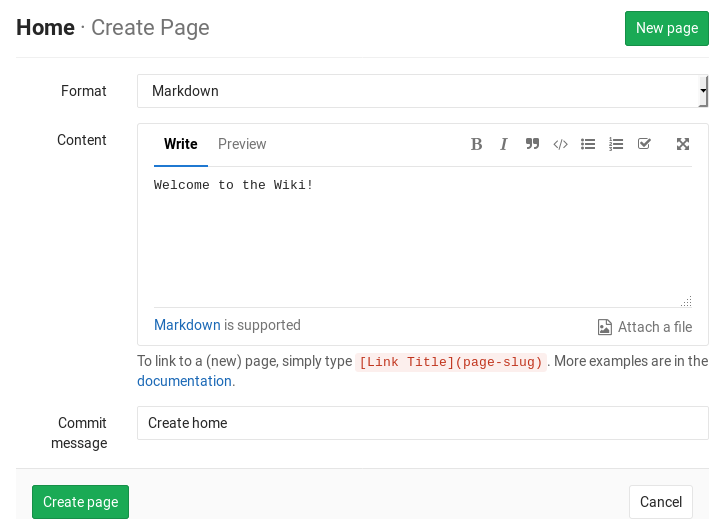
The first time you visit a Wiki, you will be directed to create the Home page. The Home page is necessary to be created since it serves as the landing page when viewing a Wiki. You only have to fill in the Content section and click Create page. You can always edit it later, so go ahead and write a welcome message.
Creating a new wiki page
NOTE: Requires Developer permissions.
Create a new page by clicking the New page button that can be found in all wiki pages.
You will be asked to fill in a title for your new wiki page.
You can specify a full path for the wiki page by using '/' in the
title to indicate subdirectories. Any missing directories will be created
automatically. For example, a title of docs/my-page will create a wiki
page with a path /wikis/docs/my-page.
Once you enter the page name, it's time to fill in its content. GitLab wikis support Markdown, RDoc, AsciiDoc, and Org. For Markdown based pages, all the Markdown features are supported and for links there is some wiki specific behavior.
In the web interface the commit message is optional, but the GitLab Wiki is based on Git and needs a commit message, so one will be created for you if you do not enter one.
When you're ready, click the Create page and the new page will be created.

Attachment storage
Introduced in GitLab 11.3.
Starting with GitLab 11.3, any file that is uploaded to the wiki via the GitLab interface will be stored in the wiki Git repository, and it will be available if you clone the wiki repository locally. All uploaded files prior to GitLab 11.3 are stored in GitLab itself. If you want them to be part of the wiki's Git repository, you will have to upload them again.
Special characters in page titles
Wiki pages are stored as files in a Git repository, so certain characters have a special meaning:
- Spaces are converted into hyphens when storing a page.
- Hyphens (
-) are converted back into spaces when displaying a page. - Slashes (
/) can't be used, because they're used as path separator.
Length restrictions for file and directory names
Introduced in GitLab 12.8.
Many common file systems have a limit of 255 bytes for file and directory names, and while Git and GitLab both support paths exceeding those limits, the presence of them makes it impossible for users on those file systems to checkout a wiki repository locally.
To avoid this situation, these limits are enforced when editing pages through the GitLab web interface and API:
- 245 bytes for page titles (reserving 10 bytes for the file extension).
- 255 bytes for directory names.
Please note that:
- Non-ASCII characters take up more than one byte.
- It's still possible to create files and directories exceeding those limits locally through Git, but this might break on other people's machines.
Editing a wiki page
You need Developer permissions or higher to edit a wiki page. To do so:
- Click the edit icon ({pencil}).
- Edit the content.
- Click Save changes.
Adding a table of contents
To generate a table of contents from the headings in a Wiki page, use the [[_TOC_]] tag.
For an example, see Table of contents.
Deleting a wiki page
You need Maintainer permissions or higher to delete a wiki page. To do so:
- Open the page you want to delete.
- Click the Delete page button.
- Confirm the deletion.
Moving a wiki page
You need Developer permissions or higher to move a wiki page. To do so:
- Click the edit icon ({pencil}).
- Add the new path to the Title field.
- Click Save changes.
For example, if you have a wiki page called about under company and you want to
move it to the wiki's root:
- Click the edit icon ({pencil}).
- Change the Title from
aboutto/about. - Click Save changes.
If you want to do the opposite:
- Click the edit icon ({pencil}).
- Change the Title from
abouttocompany/about. - Click Save changes.
Viewing a list of all created wiki pages
- Introduced in GitLab 13.5, wiki pages are displayed as a nested tree in the sidebar and pages overview.
Every wiki has a sidebar from which a short list of the created pages can be found. The list is ordered alphabetically.

If you have many pages, not all will be listed in the sidebar. Click on View All Pages to see all of them.
Viewing the history of a wiki page
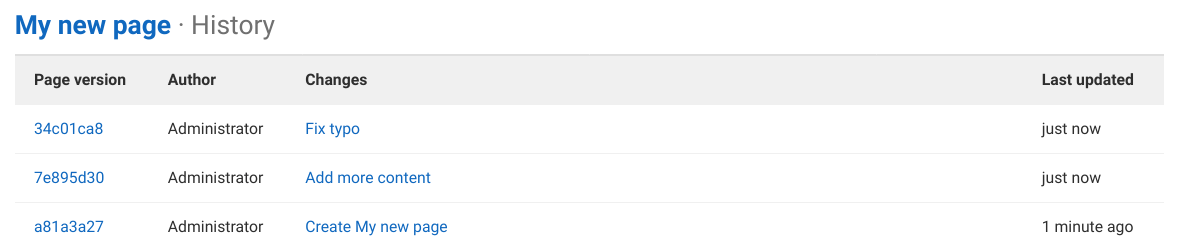
The changes of a wiki page over time are recorded in the wiki's Git repository, and you can view them by clicking the Page history button.
From the history page you can see the revision of the page (Git commit SHA), its author, the commit message, and when it was last updated. To see how a previous version of the page looked like, click on a revision number in the Page version column.
Viewing the changes between page versions
Introduced in GitLab 13.2.
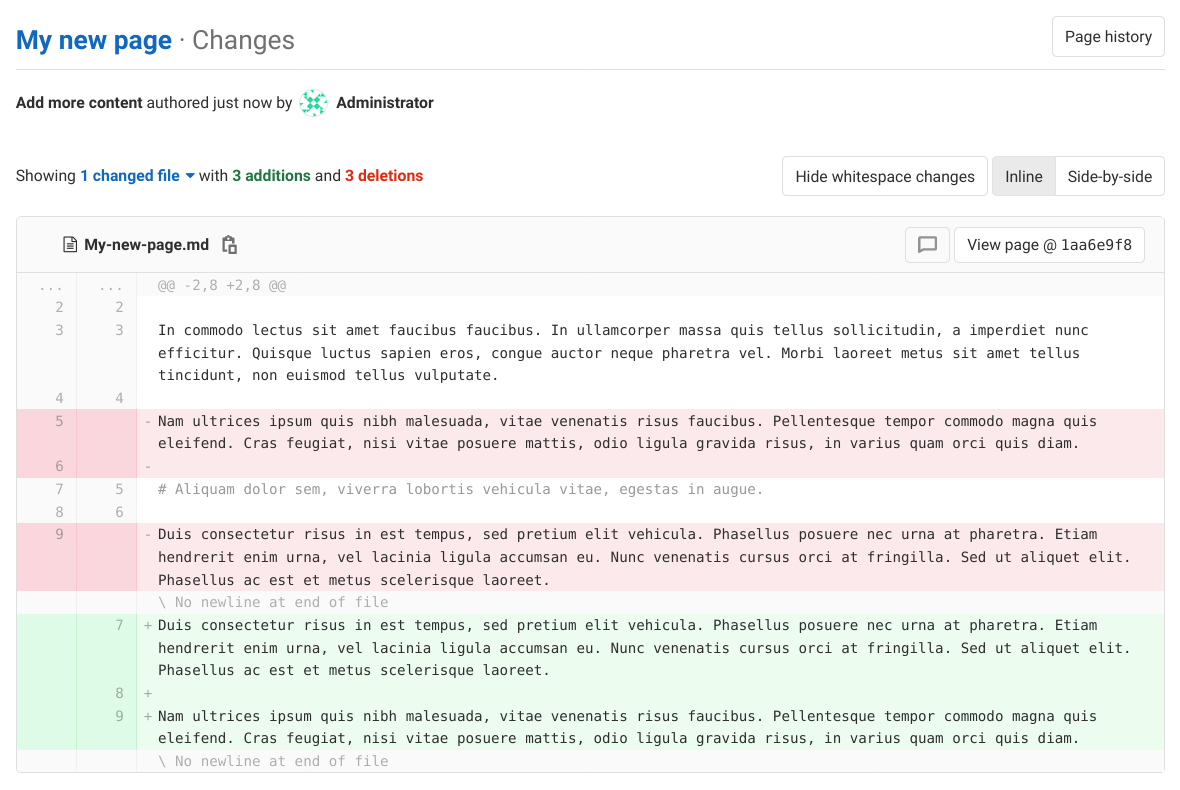
Similar to versioned diff file views, you can see the changes made in a given Wiki page version:
-
Navigate to the Wiki page you're interested in.
-
Click on Page history to see all page versions.
-
Click on the commit message in the Changes column for the version you're interested in:

Wiki activity records
- Introduced in GitLab 12.10.
- Git events were Introduced in GitLab 13.0.
- Feature flag for Git events was removed in GitLab 13.5
Wiki events (creation, deletion, and updates) are tracked by GitLab and displayed on the user profile, group, and project activity pages.
Adding and editing wiki pages locally
Since wikis are based on Git repositories, you can clone them locally and edit them like you would do with every other Git repository.
On the right sidebar, click on Clone repository and follow the on-screen instructions.
Files that you add to your wiki locally must have one of the following supported extensions, depending on the markup language you wish to use, otherwise they will not display when pushed to GitLab:
- Markdown extensions:
.mdown,.mkd,.mkdn,.md,.markdown. - AsciiDoc extensions:
.adoc,.ad,.asciidoc. - Other markup extensions:
.textile,.rdoc,.org,.creole,.wiki,.mediawiki,.rst.
Customizing sidebar
- Introduced in GitLab 13.8, the sidebar can be customized by clicking the Edit sidebar button.
To customize the Wiki's navigation sidebar, you need Developer permissions to the project.
On the top-right, click Edit sidebar and make your changes. This creates a wiki page named _sidebar which fully replaces the default sidebar navigation.
Example for _sidebar (using Markdown format):
### [Home](home)

- [Hello World](hello)
- [Foo](foo)
- [Bar](bar)

---

- [Sidebar](_sidebar)
Support for displaying a generated table of contents with a custom side navigation is planned.